import imageio
import torch
from tqdm import tqdm
from animate import normalize_kp
from demo import load_checkpoints
import numpy as np
import matplotlib.pyplot as plt
import matplotlib.animation as animation
from skimage import img_as_ubyte
from skimage.transform import resize
import cv2
import os
import argparse
ap = argparse.ArgumentParser()
ap.add_argument("-i", "--input_image", required=True,help="Path to image to animate")
ap.add_argument("-c", "--checkpoint", required=True,help="Path to checkpoint")
ap.add_argument("-v","--input_video", required=False, help="Path to video input")
args = vars(ap.parse_args())
print("[INFO] loading source image and checkpoint...")
source_path = args['input_image']
checkpoint_path = args['checkpoint']
if args['input_video']:
video_path = args['input_video']
else:
video_path = None
source_image = imageio.imread(source_path)
source_image = resize(source_image,(256,256))[..., :3]
generator, kp_detector = load_checkpoints(config_path='config/vox-256.yaml', checkpoint_path=checkpoint_path)
if not os.path.exists('output'):
os.mkdir('output')
relative=True
adapt_movement_scale=True
cpu=False
if video_path:
cap = cv2.VideoCapture(video_path)
print("[INFO] Loading video from the given path")
else:
cap = cv2.VideoCapture(0)
print("[INFO] Initializing front camera...")
fourcc = cv2.VideoWriter_fourcc(*'MJPG')
out1 = cv2.VideoWriter('output/Animation_HuGe_02.avi', fourcc, 12, (256*3 , 256), True)
cv2_source = cv2.cvtColor(source_image.astype('float32'),cv2.COLOR_BGR2RGB)
with torch.no_grad() :
predictions = []
source = torch.tensor(source_image[np.newaxis].astype(np.float32)).permute(0, 3, 1, 2)
if not cpu:
source = source.cuda()
kp_source = kp_detector(source)
count = 0
while(True):
ret, frame = cap.read()
frame = cv2.flip(frame,1)
if ret == True:
if not video_path:
x = 143
y = 87
w = 322
h = 322
frame = frame[y:y+h,x:x+w]
frame1 = resize(frame,(256,256))[..., :3]
if count == 0:
source_image1 = frame1
source1 = torch.tensor(source_image1[np.newaxis].astype(np.float32)).permute(0, 3, 1, 2)
kp_driving_initial = kp_detector(source1)
frame_test = torch.tensor(frame1[np.newaxis].astype(np.float32)).permute(0, 3, 1, 2)
driving_frame = frame_test
if not cpu:
driving_frame = driving_frame.cuda()
kp_driving = kp_detector(driving_frame)
kp_norm = normalize_kp(kp_source=kp_source,
kp_driving=kp_driving,
kp_driving_initial=kp_driving_initial,
use_relative_movement=relative,
use_relative_jacobian=relative,
adapt_movement_scale=adapt_movement_scale)
out = generator(source, kp_source=kp_source, kp_driving=kp_norm)
predictions.append(np.transpose(out['prediction'].data.cpu().numpy(), [0, 2, 3, 1])[0])
im = np.transpose(out['prediction'].data.cpu().numpy(), [0, 2, 3, 1])[0]
im = cv2.cvtColor(im,cv2.COLOR_RGB2BGR)
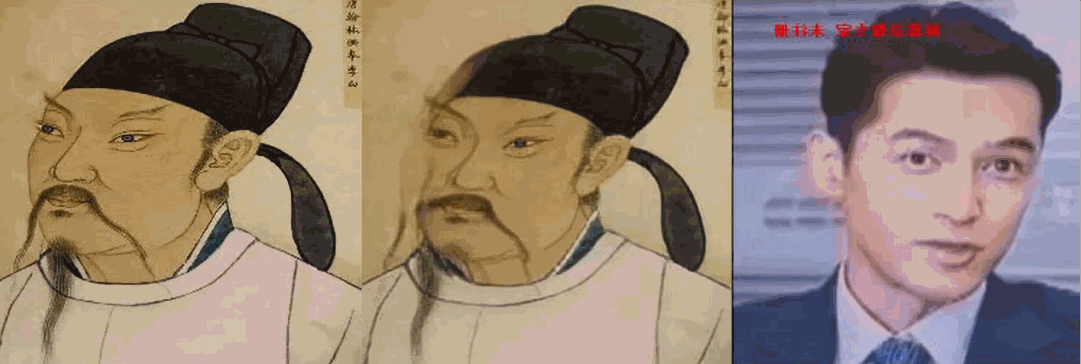
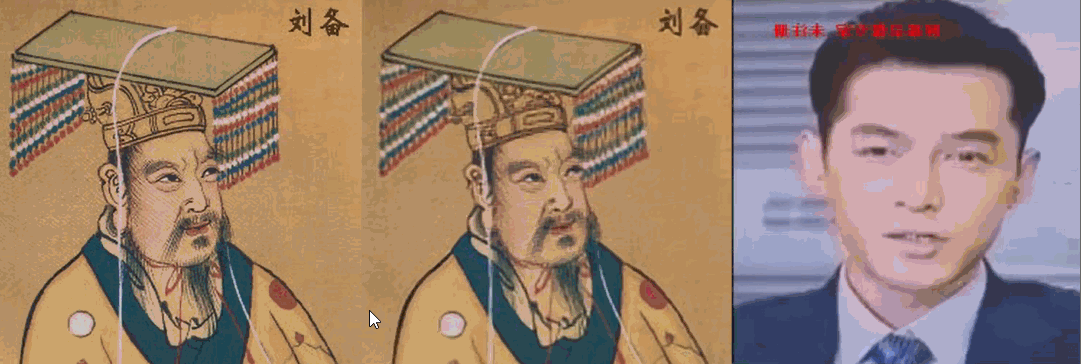
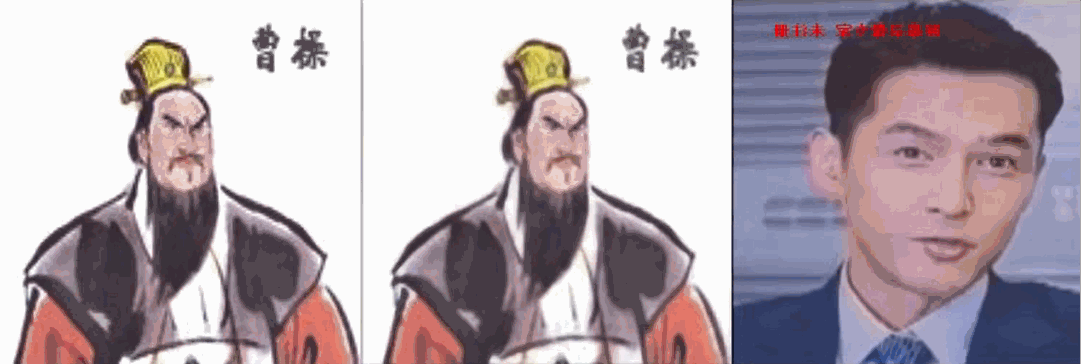
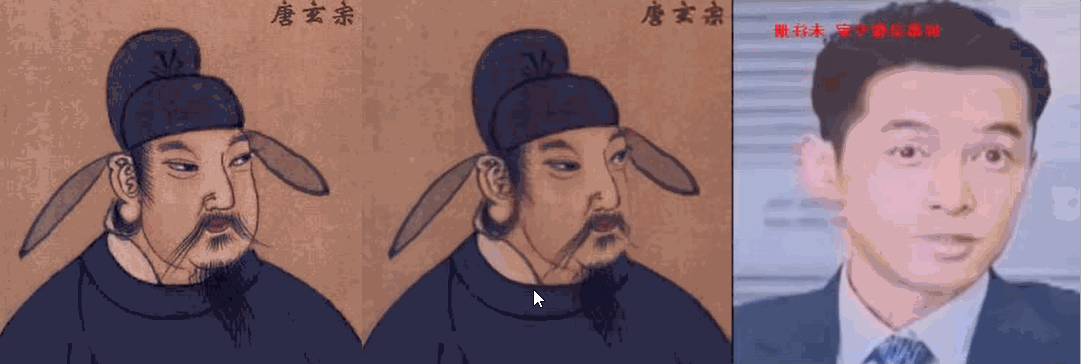
joinedFrame = np.concatenate((cv2_source,im,frame1),axis=1)
cv2.imshow('Test',joinedFrame)
out1.write(img_as_ubyte(joinedFrame))
count += 1
if cv2.waitKey(20) & 0xFF == ord('q'):
break
else:
break
cap.release()
out1.release()
cv2.destroyAllWindows()
本文首发于python黑洞网,博客园同步更新


 登录查看全部
