原文:https://juejin.cn/user/184373683164589
作者:Jenniferyingni
转载需经过作者本人授权。
基于 Vue3 的组件库 element-plus[1] 正式发布,element-plus 是一个使用 TypeScript + Composition API 重构的全新项目。官方列出了下面几项主要更新,本文会阅读 element-plus 的源码,从以下几个方面在整体和细节上来分析重构之后的源码,建议阅读本文前先 clone 组件代码。
-
使用 TypeScript 开发 -
使用 Vue 3.0 Composition API 降低耦合,简化逻辑 -
使用 Vue 3.0 Teleport 新特性重构挂载类组件 -
Vue 2.0 全局 API 切换为 Vue 3.0 实例 API -
国际化处理 -
官方文档网站打包 -
组件库和样式打包 -
使用 Lerna 维护和管理项目
Typescript 相关
element-plus 引入了 typescript, 除了配置对应的 eslint 校验规则、插件,定义 tsconfig.json 之外,打包 es-module 格式组件库的时候的时候使用到了一些 rollup 插件。
-
@rollup/plugin-node-resolve -
rollup-plugin-terser -
rollup-plugin-typescript2 -
rollup-plugin-vue
// build/rollup.config.bundle.js
import { nodeResolve } from "@rollup/plugin-node-resolve";
import { terser } from "rollup-plugin-terser";
import typescript from "rollup-plugin-typescript2";
const vue = require("rollup-plugin-vue");
export default [
  {
    // ... 省略前面部分内容
    plugins: [
      terser(),
      nodeResolve(),
      vue({
        target: "browser",
        css: false,
        exposeFilename: false,
      }),
      typescript({
        tsconfigOverride: {
          include: ["packages/**/*", "typings/vue-shim.d.ts"],
          exclude: ["node_modules", "packages/**/__tests__/*"],
        },
      }),
    ],
  },
];
复制代码;
@rollup/plugin-node-resolve 打包依赖的 npm 包。
rollup-plugin-terser 压缩代码rollup-plugin-vue[2] 打包 vue 文件, css 样式交给了后续会提到的 gulp 来处理。
rollup-plugin-typescript2 是用了编译 typescript 的, 配置中排除了 node-modules 和测试相关文件, include 除了包含组件实现,还包含了 typings/vue-shim.d.ts 文件。
插件中使用到的 typings/vue-shim.d.ts 类型声明文件( 以 .d.ts 结尾的文件会被自动解析 ),定义了一些全局的类型声明,可以直接在 ts 或者 vue 文件中使用这些类型约束变量。还使用扩展模板对 import XX from XX.vue 的引入变量给出类型提示。
// typings/vue-shim.d.ts
declare module '*.vue' {
  import { defineComponent } from 'vue'
  const component: ReturnType<typeof defineComponent>
  export default component
}
declare type Nullable<T> = T | null;
declare type CustomizedHTMLElement<T> = HTMLElement & T
declare type Indexable<T> = {
  [key: string]: T
}
declare type Hash<T> = Indexable<T>
declare type TimeoutHandle = ReturnType<typeof global.setTimeout>
declare type ComponentSize = 'large' | 'medium' | 'small' | 'mini'
复制代码
除了 d.ts 文件之外,element-plus 中对于 props 的类型声明使用了 vue3 的 propType。以 下面的 Alert 为例, 使用了 PropType 的 props 类型会执行符合我们自定义的规则的构造函数,然后结合 typescript 做类型校验。其他非 props 中的类型声明则是使用了 interface 。
import { PropType } from 'vue'
export default defineComponent({
  name: 'ElAlert',
  props: {
    type: {
      type: String as PropType<'success' | 'info' | 'error' | 'warning'>,
      default: 'info',
    }
  }
})
复制代码
更多 vue3 的 typescript 支持可以查看官方文档[3]
Composition API
官方说明使用了 Vue 3.0 Composition API 降低耦合,简化逻辑。Composition API 的使用和 hooks 的复用 vue-3-playground[4] 中通过一个购物车 demo 的实现提供了一个直观和简洁的示例。
关于常用的 Composition API 的用法,可以查看这篇总结得比较好的文章:快速使用 Vue3 最新的 15 个常用 API[5]
除了使用新的 Composition API 来改写组件之外,element-plus 中 packages/hooks 目录下抽取了几个可复用的 hooks 文件:
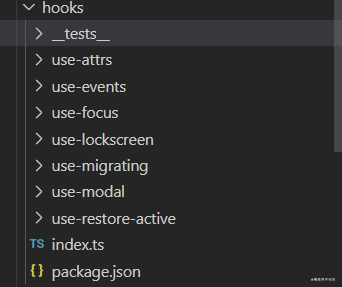
以 autocomplete, input 等控件使用到的 use-attrs 为例, 主要做的事情是继承绑定的属性和事件,类似于 $attrs 和 $listener 功能,但是做了一些筛选,去掉了一些不需要继承的属性和事件绑定。
watchEffect(() => {
  const res = entries(instance.attrs).reduce((acm, [key, val]) => {
    if (
      !allExcludeKeys.includes(key) &&
      !(excludeListeners && LISTENER_PREFIX.test(key))
    ) {
      acm[key] = val;
    }
    return acm;
  }, {});
  attrs.value = res;
});
复制代码;
Vue3 中仍然保留了 mixin,我们可以在特定组件或者是全局使用 mixin 来复用逻辑,同时也引入了 hooks 来改善 mixin 存在的一些问题[6]:
渲染上下文中公开的属性的来源不清楚。例如,当使用多个 mixin 读取组件的模板时,可能很难确定从哪个 mixin 注入了特定的属性。 命名空间冲突。Mixins 可能会在属性和方法名称上发生冲突
Hooks 带来的好处是
暴露给模板的属性具有明确的来源,因为它们是从 Hook 函数返回的值。 Hook 函数返回的值可以任意命名,因此不会发生名称空间冲突。
Teleport 的使用
element-plus 对几个挂载类组件使用了 vue3 的新特性 Teleport,这个新特性可以帮我们把其包裹的元素移动到我们指定的节点下。
Teleport 提供了一种干净的方法,允许我们控制在 DOM 中哪个父节点下呈现 HTML,而不必求助于全局状态或将其拆分为两个组件。-- Vue 官方文档
查看官网我们会发现 Dialog,Drawer,以及使用了 Popper 的 Tooltip 和 Popover 都新增了一个 append-to-body 属性。
我们以 Dialog 为例:appendToBody 为 false, Teleport 会被 disabled, DOM 还是在当前位置渲染。
当 appendToBody 为 true 时, dialog 中的内容放到了 body 下面。
<template>
  <teleport to="body" :disabled="!appendToBody">
    <transition
      name="dialog-fade"
      @after-enter="afterEnter"
      @after-leave="afterLeave"
    >
        ...
     </transition>
  </teleport>
</tamplate>
在原来的 element-ui 中,Tooltip 和 Popover 也是直接放在了 body 中,原来是通过 vue-popper.js 来使用 document.body.appendChild 来添加元素到 body 下的,element-plus 使用 Teleport 来实现相关逻辑。
全局 API - 实例 API
当我们安装好组件库,use 方法会执行 install 方法去全局挂载组件。
我们先来看一下 Vue 2.x element-ui 中全局 API 的写法:
-
Vue.component 方法绑定全局组件 -
Vue.use 绑定全局自定义指令 -
Vue.prototype 绑定全局变量和全局方法
const install = function (Vue, opts = {}) {
  locale.use(opts.locale);
  locale.i18n(opts.i18n);

  // Vue.component 方法绑定全局组件
  components.forEach((component) => {
    Vue.component(component.name, component);
  });

  // Vue.use 绑定全局自定义指令
  Vue.use(InfiniteScroll);
  Vue.use(Loading.directive);

  // Vue.prototype 绑定全局变量和全局方法
  Vue.prototype.$ELEMENT = {
    size: opts.size || "",
    zIndex: opts.zIndex || 2000,
  };
  Vue.prototype.$loading = Loading.service;
  Vue.prototype.$msgbox = MessageBox;
  Vue.prototype.$alert = MessageBox.alert;
  Vue.prototype.$confirm = MessageBox.confirm;
  Vue.prototype.$prompt = MessageBox.prompt;
  Vue.prototype.$notify = Notification;
  Vue.prototype.$message = Message;
};
但是在 vue 3.0 中,任何全局改变 Vue 行为的 API 现在都会移动到应用实例上,也就是 createApp 产生的 app 上了, 对应的 API 也做了相应的变化。再来看使用 Vue 3.0 的 element-plus 中,全局 API 改写成了实例 API。
import type { App } from 'vue'
const plugins = [
  ElInfiniteScroll,
  ElLoading,
  ElMessage,
  ElMessageBox,
  ElNotification,
]
const install = (app: App, opt: InstallOptions): void => {
  const option = Object.assign(defaultInstallOpt, opt)
  use(option.locale)
  app.config.globalProperties.$ELEMENT = option    // 全局设置默认的size属性和z-index属性
  // 全局注册所有除了plugins之外的组件
  components.forEach(component => {
    app.component(component.name, component)
  })
  plugins.forEach(plugin => {
    app.use(plugin as any)
  })
}
复制代码
除此之外写法上有一些不同的是,消息类组件添加 $ 全局方法在 element-plus 中被移动到了 index.ts 里面, 几个消息通知类型的组件都放到了 plugins,使用 app.use 会调用对应组件 index.ts 中的 install 方法,代码如下:
(Message as any).install = (app: App): void => {
  app.config.globalProperties.$message = Message
}
复制代码
国际化
packages 下有一个 locale 文件夹,控制语言切换 packages/locale/index.ts 中抛出了 2 个方法,方法 t 和方法 use, t 控制 vue 文件中文本的翻译替换,use 方法修改全局语言
// packages/locale/index.ts
export const t = (path: string, option?): string => {
  let value;
  const array = path.split(".");
  let current = lang;
  for (let i = 0, j = array.length; i < j; i++) {
    const property = array[i];
    value = current[property];
    if (i === j - 1) return template(value, option);
    if (!value) return "";
    current = value;
  }
  return "";
};
复制代码;
会在 vue 文件中引入 locale 中的 t 方法
import { t } from "@element-plus/locale";
复制代码;
然后就可以在 template 使用多语言 key 值了,例如:label="t('el.datepicker.nextMonth')" ,t 方法会帮你找到对应的语言文件中的对应值。
再来看看 use 方法,抛出的 use 方法可以设置全局语言种类,也修改

